

How To Set Up Wired Connection Windows 10
The following steps show you how to configure your network adapter on a Windows 10 organization:
Click the First icon (or printing the First button on the keyboard), and so tap or click Settings.

The Settings folio appears.
Click Network & Net.
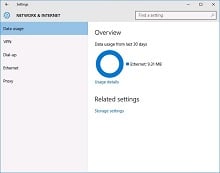
The Network & Net page appears.
Click Ethernet.
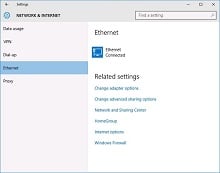
The Ethernet settings page appears.
Click Change Adapter Options.
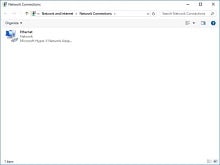
The Network Connections page appears. This page lists each of your network adapters. In this case, but a single wired Ethernet adapter is shown. If the device has more than 1 adapter, additional adapters volition announced on this folio.
Right-click the connexion that you want to configure and then choose Properties from the contextual carte du jour that appears.
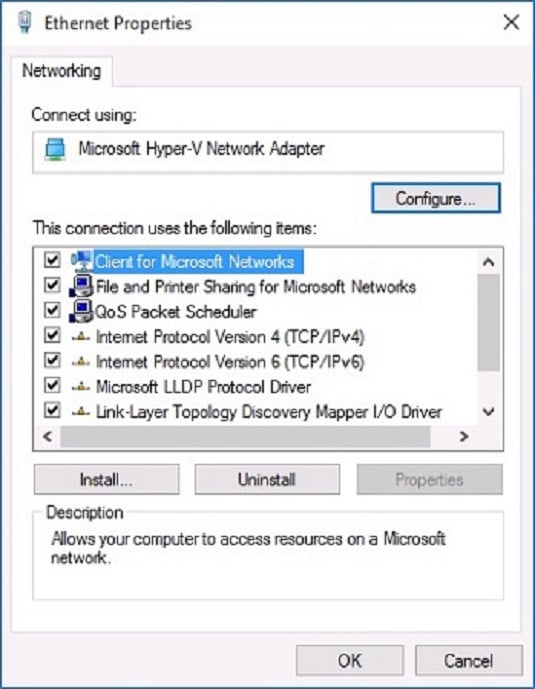
This action opens the Ethernet Properties dialog box.
To configure the network adapter carte du jour settings, click Configure.
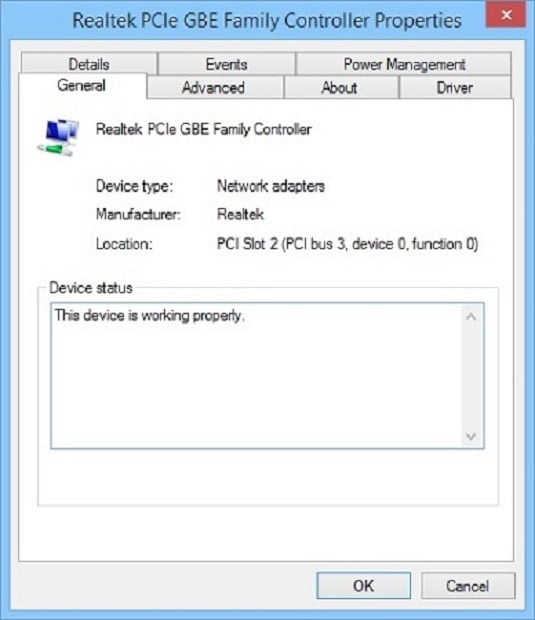
The Properties dialog box for your network adapter appears. This dialog box has seven tabs that let you configure the adapter:
- General: Shows basic data about the adapter, such every bit the device type and status.
- Advanced: Lets you set a variety of device-specific parameters that bear upon the operation of the adapter.
- About: Displays information about the device'south patent protection.
- Driver: Displays information about the device driver that'due south jump to the NIC and lets you lot update the commuter to a newer version, roll back the driver to a previously working version, or uninstall the commuter.
- Details: With this tab, yous tin audit various backdrop of the adapter such as the engagement and version of the device driver. To view the setting of a detail belongings, select the property proper name from the drop-downwards list.
- Events: Lists recent events that have been logged for the device.
- Power Management: Lets you configure ability management options for the device.
When yous click OK to dismiss the dialog box, the network connection's Properties dialog box closes and you're returned to the Network Connections page. Right-click the network adapter and choose Properties once again to continue the process.
Review the list of connection items listed in the Properties dialog box.
- Client for Microsoft Networks: This item is required if yous want to access a Microsoft Windows network. It should ever exist present.
- File and Printer Sharing for Microsoft Networks: This item allows your computer to share its files or printers with other computers on the network.This pick is usually used with peer-to-peer networks, but you can use it even if your network has dedicated servers. If you don't plan to share files or printers on the client computer, notwithstanding, you should disable this item.
- Internet Protocol Version four (TCP/IPv4): This item enables the client figurer to communicate by using the version 4 standard TCP/IP protocol.
- Net Protocol Version 6 (TCP/IPv6): This item enables version 6 of the standard TCP/IP protocol. Typically, both IP4 and IP6 are enabled, even though most networks rely primarily on IP4.
If a protocol that you need isn't listed, click the Install button to add the needed protocol.
A dialog box appears, asking whether you desire to add together a network client, protocol, or service. Click Protocol and then click Add together. A list of available protocols appears. Select the i y'all want to add; then click OK.
To remove a network detail that y'all don't need (such as File and Printer Sharing for Microsoft Networks), select the particular, and click the Uninstall button.
For security reasons, you should make it a point to remove any clients, protocols, or services that you don't need.
To configure TCP/IP settings, click Cyberspace Protocol (TCP/IP); click Backdrop to display the TCP/IP Properties dialog box; adjust the settings; and so click OK.
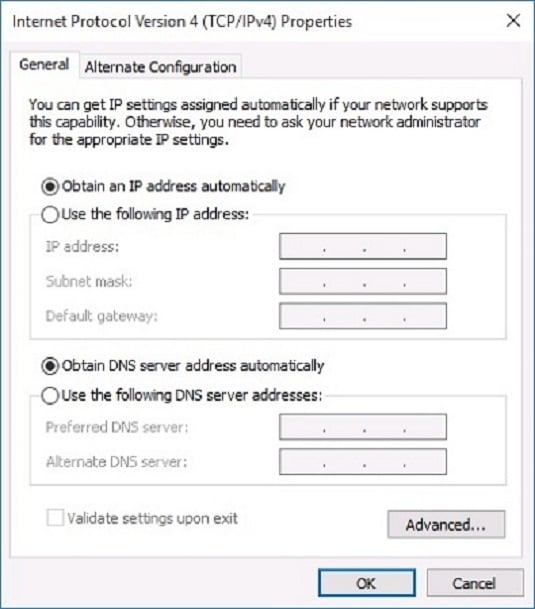
The TCP/IP Properties dialog box lets you lot choose amid these options:
- Obtain an IP Address Automatically: Choose this pick if your network has a DHCP server that assigns IP addresses automatically. Choosing this option dramatically simplifies administering TCP/IP on your network.
- Use the Post-obit IP Address: If your computer must have a specific IP address, choose this choice and and so blazon the computer'due south IP address, subnet mask, and default gateway address.
- Obtain DNS Server Address Automatically: The DHCP server can also provide the address of the Domain Name Organization (DNS) server that the estimator should use. Cull this option if your network has a DHCP server.
- Use the Post-obit DNS Server Addresses: Choose this choice if a DNS server isn't available. Then blazon the IP addresses of the primary and secondary DNS servers.
About This Article
This article can be plant in the category:
- Full general (Networking) ,

How To Set Up Wired Connection Windows 10,
Source: https://www.dummies.com/article/technology/information-technology/networking/general-networking/configuring-network-connections-windows-10-221858/
Posted by: bodenappee1967.blogspot.com
0 Response to "How To Set Up Wired Connection Windows 10"
Post a Comment